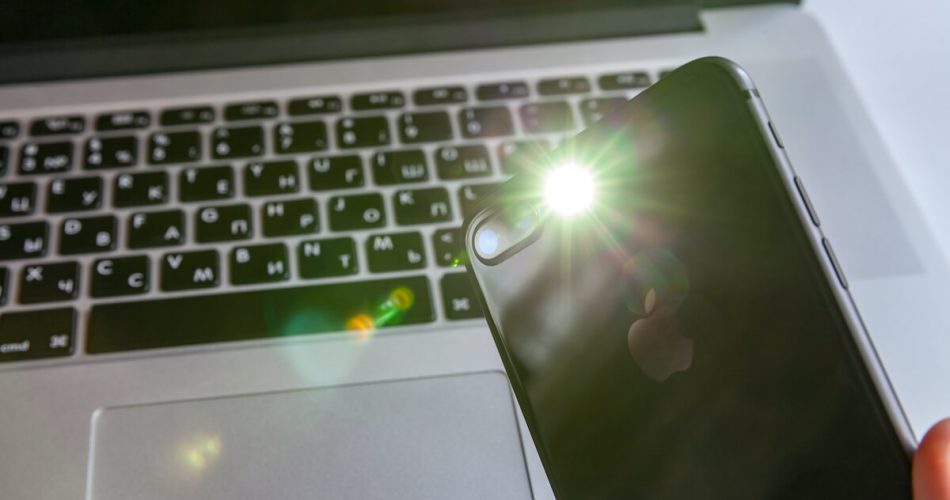
Gone are the days when a person had to fumble through piles of clothes or dig into drawers and storage boxes, searching for a flashlight. Nowadays, turning on a flashlight is just a few clicks away. In addition, smartphones have made it quite accessible to switch on a flashlight.
The iPhone’s flashlight has proved to be a handy tool that many users use in times of dark or low-lit locations. So whether hiking in the wild or delving into a dark room, we switch on the iPhone flashlight to search our way.
Apple Inc. has made access to the flashlight very simple. iPhone users can easily switch it on the right from the lock screen.
Nevertheless, the flashlight feature in the iOS device is supposed to operate generally because all it does is flash a light. However, that doesn’t mean it’s invincible to malfunction. But worry not, we’ve narrowed down some great practical tips to fix the iPhone flashlight not working.
Table of Contents
Reasons Behind Flashing Not Working of iPhone
There are several reasons behind a poor working flashlight. Before you try out different methods to fix the flashlight of the iPhone, it’s essential to identify the leading cause preventing it from working.
The potential culprit behind the flashlight not working in an iPhone could be:
- Broken flashlight mirror
- Software bug
- Hardware problem
- Outdated iOS update
- iPhone Settings
Methods to Troubleshoot Flashlight Issues
Restart Your iPhone or iPad
The first and standard solution iOS users should try is to restart their iPhone or iPad. This fix is beneficial, especially if there is some flashlight issue.
By simply restarting the iPhone, you’re refreshing every app and activity on your device that may usually interrupt the flashlight from working. To restart your iPhone, follow these steps:
Step # 01: Hold and press the power button on the right side of your iPhone or iPad
Step # 02: Release the power button when a dialogue box “Slide to Power Off” at the bottom of the home screen appears
Step # 03: Slide the dialogue box to the right to force the restart iPhone
Step # 04: After switching off, wait for a while.
Step # 05: Once your device is powered off, press the Power button and hold it until the Apple logo appears on the home screen
Typically, your flashlight problem will likely be resolved after this method.
Charge your iOS Device
Flashlight consumes so much power and battery from Apple devices. Mostly, the main reason behind iPhone’s flashlight not working is the low battery. If your device has 20% or less battery, recharge your iPhone and force restart it to see if the flashlight now works.
Remove Cases or Screen Protector
Apple devices are known to be delicate high-end devices. Your iPhone or iPad won’t last long without a solid case and screen back protector. So, it’s common for iOS users to have cases and screen back protectors to secure their iPhones from breaking.
However, these cases and screen protectors do not always have precise cutouts and pattern structures.
One of the reasons behind the iPhone flashlight not working is the unprecise case or thick screen protector. They could block the light or put too much pressure on the flashlight.
So, remove any case or protector and clear your flashlight icon with a microfiber cloth to remove any dirt or dust. Once done, check if it’s working correctly now.
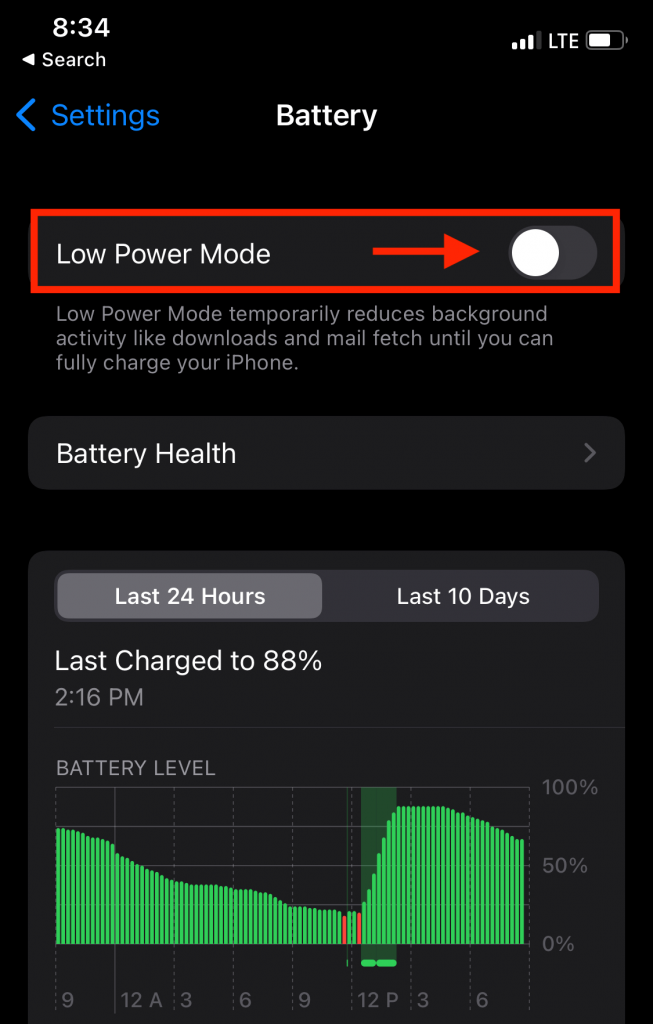
Disable Low Power Battery Mode
Another common reason for an iPhone flashlight not working is the low power mode. Whenever an iPhone battery goes below 20%, the operating system goes into low power battery mode by default settings to reduce excessive battery consumption.
Once the iPhone is plugged in for charging, it returns to standard mode. However, in rare cases, the iPhone stays at low power battery mode. This can limit the functionality of the iPhone flashlight.
To check if the low-power battery mode is turned off, follow these steps:
Step # 01: Go to settings app > Select the Battery bar
Step # 02: Scroll down and disable the low power mode
Test Flashlight from Camera App
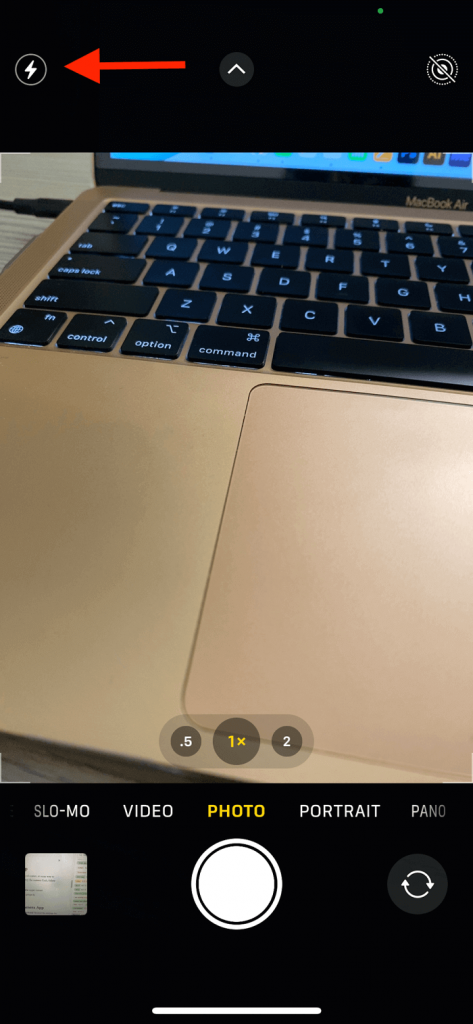
If the iPhone flashlight icon appears to be greyed out in the Control center, an easy way to solve it is to go to the Camera app and test the camera flash. To try the camera flash, follow these steps:
- Open the iPhone camera app and click the Flash Icon on the upper corner
- Turn on and off the flashlight button till it starts to work properly
Change Flash Settings from Camera App
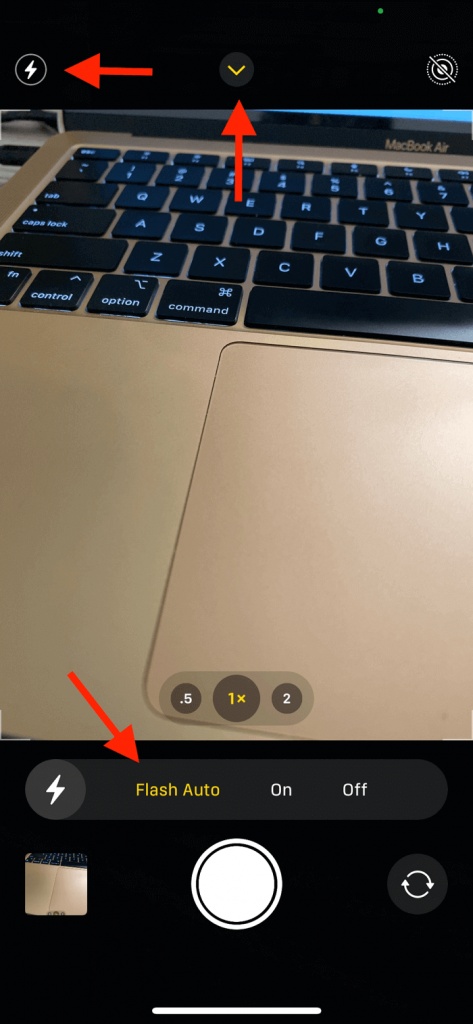
If the iPhone flashlight only works in the iPhone camera, it’s probably because the settings for the flashlight in the camera are auto-set. The auto-set activates the iPhone flashlight occasionally. In easy words, the flashlight only works when the iPhone camera indicates it.
Change the factory settings to turn on the flashlight without using the iPhone camera. The steps below demonstrate how to fix and change flash settings from the Camera app:
- Open the iPhone Camera app
- Click on the Flashlight icon
- Reset the Auto option from Off to On
- On iPhone 11 and up, click on the flash icon and then the arrow up icon. You will now see a flash icon at the bottom edge of the screen. Click it and select the auto option
- Now close the Camera app and click the Home Button
- Swipe up to the Control Center to check if the flashlight work now
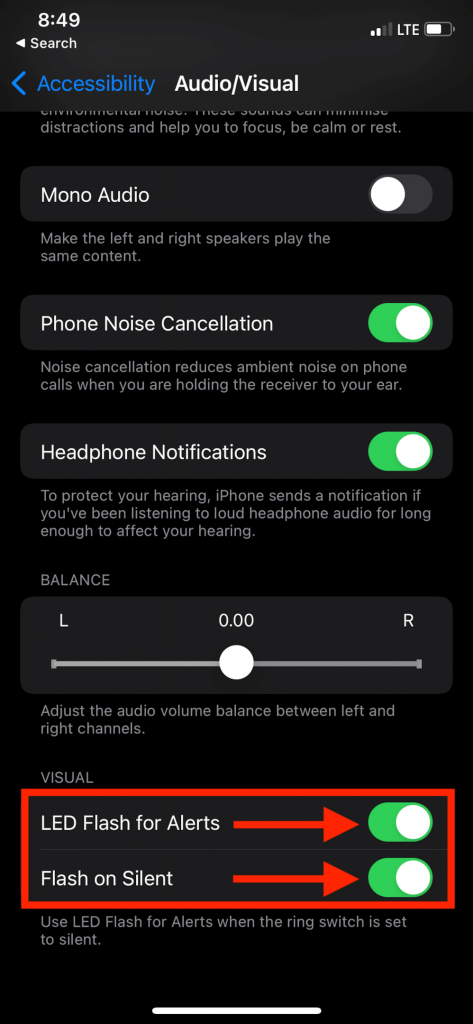
Enable LED Flash for Alerts
An exciting feature that sets the iPhone apart from any other smartphone is its flash features for alerts. Check the default settings if you’ve selected the flash alert to receive any notification but no longer see the flashlight.
The steps to enabling LED flash include:
- Visit the Settings app
- Go into Accessibility
- Select Audio / Visual option. Slide the toggle right next to an LED flash
- If it’s already enabled, disable it and then enable it again.
Switch off the Focus Feature
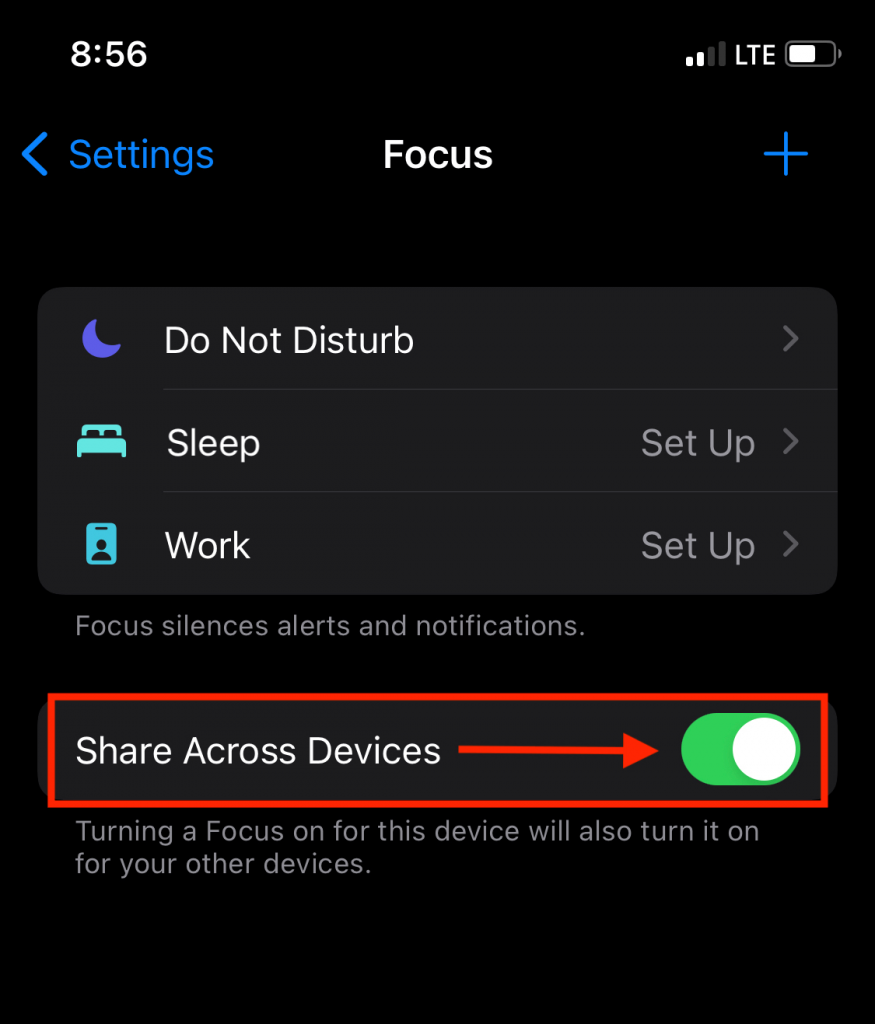
The focus feature in the iPad or iPhone is an advanced and convenient model of “Do Not Disturb Mode” When turned on, it mutes every notification and activity on the lock and home screens.
It also displays a status message on your phone to indicate the notifications have been muted.
The focus feature limits the device’s activity. So, it’s essential to make sure the focus status like Reading, low battery mode, do not disturb, switched-off visual interactions, alerts, etc., are turned off if you see your iPhone flashlight not working.
To do so, follow these instructions:
- Open the Settings app
- Scroll down and tap on Focus
- Check if the toggle next to the focus feature is turned off.
Download the Latest Version of Software Update
Most of the time, it’s common for a flashlight to stop working after a new iOS update. It happens mainly because apps and features in your iPhone are refreshed, which could result in some bug or glitch in a software update, preventing the flashlight from working.
To fix the flashlight on your iPhone, you must check and download the latest version of the iOS update. Follow these steps:
- Go to the Settings app
- Enter General
- Tap on Software Updates to see if there are any latest updates available and proceed
Reset iPhone Setting Apps
If all the above methods haven’t worked out in your favor, it’s time to approach the last resort, “Hard Reset”, also called factory reset, to fix the not working flashlight. If none of the above methods worked to fix the flashlight, there might be a hardware problem.
Moreover, if you’ve recently changed the settings of your mobile, there is a chance to why your flashlight is not working correctly. To hard reset your transferable, follow these steps:
To reset your device to the default settings, follow these steps:
- First, go to the Settings app on your iPhone and Click on General
- Select the Reset option. Tap on it to bring the setting to factory settings
- A confirmation dialogue box will appear on your screen to confirm the reset
- Confirm the process by clicking on “Reset All the Setting“
In addition, resetting your phone will bring your customized settings to their factory settings. So if you’ve done a backup, none of your content, files, etc., will there be no data loss?
As a result, any bug or glitch causing the flashlight not to work or deactivate will be fixed.
Wrap Up
If all the above methods don’t fix your issue, it’s time to contact Apple support for professional assistance. Any method not included in this article could seriously cause a significant software and hardware problem.
It’s wise to reach out to your nearest Apple store instead of trying any other method, as it could invalidate the device’s warranty.

