
One of the features that give Windows an edge over Mac is its easy-to-use operating system. For example, you can easily create a new text file on Windows from the context menu that appears right-clicking anywhere on the screen.
But, with Mac, this feature was missing from the very start. However, that doesn’t mean you can’t create or save a new text file on a Mac.
Yes, it takes more steps than Windows, but Mac does offer various cool features for editing your text file, which Windows doesn’t.
So let’s have a look at different ways you can create, format, and save a new text file in any folder on a Mac.
Table of Contents
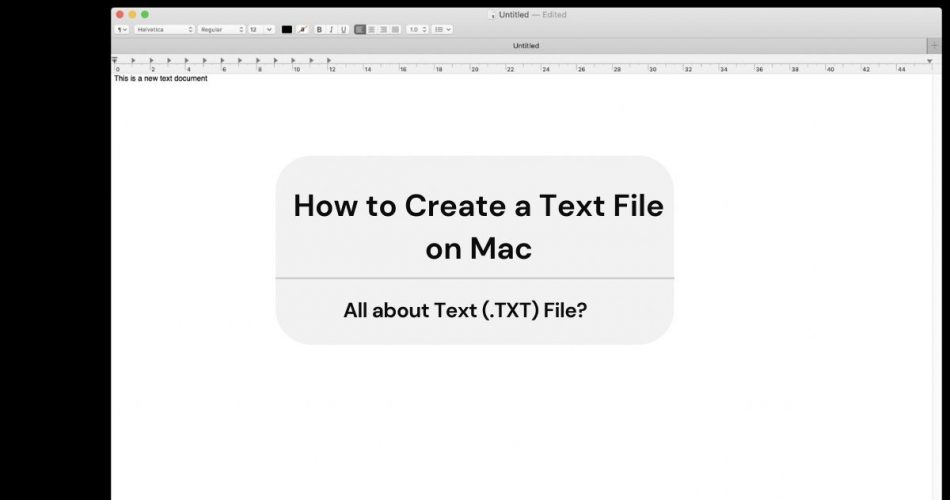
What is a Text (.TXT) File?
A ‘text’ or ‘.txt’ file consists of unformatted plain text without photos or unique fonts. The ‘.txt’ refers to the file extension, and ‘unformatted’ means the text file doesn’t have any styling or new fonts used in it.
For example, the plain text files don’t have different colored fonts, italic styling, tables, charts, hyperlinks, bold texts, and bullet points.
Almost every computer operating system has its in-built tools that you can use to create a new text file.
On Mac, you can primarily create, format, save, and find a .txt file with a text editor, known as TextEdit. The good news is you don’t have to download it from the App store; it comes with the macOS software.
If you’re looking for other alternatives, Mac gives you two options to create a text file: Automator and Terminal.
Character Encodings in the Text Files
Although a text file may seem the simplest form of the file you can create and open on your device, it is much more than that.
Every text file varies from the other. Moreover, almost all the files have contrasting character encodings, which shows how different symbols, alphabets, letters, and emojis are translated into the language of the computers.
The computers do this translation to store data efficiently.
Moreover, there are multiple types of encodings opted by the computers, which vary with the language of that country. But if you’re an American, you’ll be primarily using ASCII and Unicode systems.
Fortunately, Mac’s processing programs can automatically detect and encode the text of a file. But if the file has wrong encoding, that means the text is entirely or partially unreadable.
In addition, every operating system and text processing program uses several methods to interpret and represent a text’s ending line.
So if a file is sent and received multiple times between different operating systems, like from Microsoft Windows to Linux or from Apple macOS to Windows, there is a chance that it can damage or mangle.
What is TextEdit?
TextEdit is the feature included in all Mac models and versions of OS X and macOS. It comes in handy when you have to create and edit a new text file.
However, that’s what everyone knows about TextEdit. What if we tell you that you can convert your text files from one format to another, create a new HTML document, and write on your images – all with one app? Sounds interesting, right?
Here is everything TextEdit allows you to do:
Open, Edit, and Save Your Text Documents in Different Formats
TextEdit allows you to open the rich text files you created in other apps, like Microsoft Word and edit them. Plus, you can also change your file format to make it compatible with different operating systems or apps.
Write and Edit HTML Codes into Documents
With TextEdit, you can easily create and edit any HTML code into a text file. Later, you can open and view these HTML documents like the browser or launch TextEdit as the HTML code editor.
You can do that as follows:
Create an HTML Document
- Go to the TextEdit app.
- Then, Choose File > New > Choose Format > Make Plain Text.
- Now, insert the HTML code.
- Again, select Choose File > Save.
- Enter a name with the ‘.html’ extension, and save.
- Choose ‘Use .html.’, when asked about the extension.
Open an HTML Document
- Launch the TextEdit app.
- Select Choose File > Open. Choose the document you want to view.
- Now, click Options present at the bottom of the TextEdit dialog screen.
- Click ‘Ignore rich text commands.’
- Now, open.
Write on the Photos
You can even write or draw on the photos used in your text files. Not just that, you can rotate, crop, add symbols, texts, shapes, and signatures to them using multiple tools in the Markup toolbar within the TextEdit app.
Do it as follows:
- Open the TextEdit app.
- Take the cursor over the image, and select the Markup pop-up menu.
- Now, choose Markup and write or draw anything using the tools from the toolbar. Of course, you can also use the Touch Bar.
- Click Done.
How to Create a New Text File Using TextEdit?

Almost all Mac computers come with apps that give users free access to create different types of documents. For example, you can create spreadsheets, annual reports, presentations, text documents, and much more with these apps.
If you want to create a text document, you can easily do that through the TextEdit app.
Here is how:
- Open the TextEdit app on your Mac.
- Select ‘New Document’ from the Open dialog, or click ‘Choose File’ and then ‘New.’
- You have two format options in the TextEdit; one is plain text format (.txt file), and the other is rich text format (.rtf file). The difference between the two is that plain text doesn’t have formatting and rich text allows you to format different photos and tables in your file.
- The default format is rich text, but you can choose any as per your choice.
Mac has multiple alternatives to create a plain text file, such as Pages, Numbers, and Keynote.
Pages allow you to create letters and posters with beautiful templates.
However, if you can’t find any of the apps on your Mac, you can easily install them from the App store. They are available for all iOS and iPadOS devices.
How to Format a Text File With TextEdit?
You can format and edit the text in your documents, including text files, in various ways.
Even though the TextEdit app on your Mac may have the rich text format by default, you can change it according to your choice.
For that:
- Open TextEdit.
- Go to Preferences.
- Select Plain Text.
Moreover, you can also change the format of your text while editing the text.
- Click Format.
- Then, select ‘Make Plain Text’ or ‘Format.’
- Finally, choose ‘Make Rich Text’ or vice versa.
However, keep in mind that if you format your rich text (.rtf file) to plain text (.txt file), all the formatting options will be removed from your file.
Moreover, Mac gives you various formatting options that you can use on the texts in different documents. They include:
- Fonts and styles:You can change different fonts and styles of your text. For fonts, open a document, click Format, select Show Fonts, Format, choose Font, and then Show Fonts. For styles, choose Styles after Format.
- Colors: You can edit multiple colors in your text. For that, open your document, select Format, choose Show Colors.
- Characters:You can also enter characters in your text with different accents or diacritic marks.
How to Save Text Documents on a Mac?
Usually, most apps automatically save the documents on Mac. However, you can save your file manually too.
You can do it as follows:
- Open the document.
- Select File > Save.
- Enter your file name.
- Choose the location or folder where you want to keep the document saved. If you want more location options, click the down arrow to see them.
- Now, click Save.
If you want to save the same document with another name, you can do that as well.
For that,
- Choose File > Save As.
- Enter the new title.
- If your Mac isn’t showing you the ‘Save As’ option, hold the Option key for a while, and then open the File menu again.
Lastly, if you’re willing to save the same document as a copy, you can do it as follows:
- Choose File > Duplicate
- Or, Select File > Save As.
More importantly, you should add tags in the Finder while saving your document on the Mac. This will help you find the file later quickly.
Moreover, if you want to open or save your file on multiple devices, you can do that by saving your document in iCloud Drive. You can then log in to your iCloud ID on any device and get access to that document.
How to Find Documents on a Mac?
Mac has various ways to find any document for you.
They are:
- The Tags: If you tagged your file, open the Finder to search for it. In the Finder window, select the tag in the Finder bar and find your document.
- The Spotlight: Find a document on Spotlight, open it, and enter the file’s name in the search bar. If you specify the document’s criteria, Spotlight can also narrow down the results for you.
- The Recents Folder: You can easily find your document from the Recents folders in the sidebar of the Finder window.
- The Recent Items: If you’ve just worked on a document, open the Apple menu > Recent Items. The document will surely be there.
Some Other Text Editors
Luckily, newer versions of macOS come up with at least two in-built command line text editors, named Vim and Emacs.
If you’re a beginner, you might have some difficulties in using these tools. However, you can learn them with great focus, as mainly, these tools are used by professional programmers and IT officers. The good thing is that both are free of cost.
Besides, if you want to buy text editing software with up-to-date features, you can find them easily on your Mac. The most common tools are Atom and Sublime Text.
Microsoft Word’s widely-used word processing program also has modified text editing features if you didn’t know it already.
How to Create a Text File on a Mac Using Automator?
If you want to create a new text file using the Automator, you must first create an app. After that, you’ll be able to create a new file in any folder you like.
Here is what you need to do:
- Open Automator.
- Now, click the ‘Applications’ folder.
- Select ‘New Document’ and create a new app.
- A screen will appear asking you the type of document you want to create. Click on it, select Application > Choose.
- After that, drag the “Run AppleScript” action from the Actions menu and place it into the workflow panel present on the right side.
- Now, the workflow panel allows you to enter an AppleScript in it. For that, you have to copy the script given below and paste it on the workflow panel into the AppleScript box.
- “tell application “Finder” to make new file at (the target of the front window) as an alias.”
- Select the File menu available on the top and then click ‘Save.’
- The following window will ask you to enter your application’s name and the location where you want to save it.
- You can enter any name you like, but select the ‘Applications’ folder for the file location.
- Plus, set the File Format to ‘Application.’ You can find it in the drop-down menu.
- Click ‘Save.’
- Now, open the ‘Applications’ folder with the help of Finder. Drag and drop the application you created earlier onto the toolbar.
- Once the application reaches the Finder’s toolbar, you can create a new text file with a click in any folder of your Mac.
- For that, open a folder and click the app icon you just placed in the toolbar. A plain text file will be created there quickly with an ‘untitled’ name.
- Finally, you can now open the new file by double-clicking on it. Again, use any editor you like, edit the file however you wish, and add as many words as you want.
This is the fastest and simplest method of creating a new text file in any folder on a Mac.
How to Create a New Text File on a Mac Using Terminal?
If you want to opt for an option other than the Automator one, you will have to bear some additional steps with the Terminal method.
Here is how you can create a new text file on your Mac by using Terminal:
- First, in the Finder, choose the folder you want to create a text file in.
- Now, click the top menu in the Finder followed by ‘Services,’ and choose the ‘New Terminal at Folder’ option.
- A Terminal window will be opened in the current working directory.
- Please copy the following script, paste it into the Terminal, and Enter.
- “touch MyFile.txt”
- You can also change the name of the file just as you want. Just edit the name in place of ‘MyFile’ and save it.
- This will immediately create a text file in your chosen folder.
The Bottom Line
So now you have learned three easy ways of creating a text file anywhere you like on your Mac.
Just follow the method step-by-step that you find the easiest and work on your content without any obstacle.
However, keep in mind to copy and paste the exact command script, or else the methods won’t work for you.
Now, create, open, and edit any text file on your Mac, just like Windows!